...
A DualShield server hosts a number of services. Each services works on a specific port. Below is a list of DualShield services and their port numbers:
| Service Name | Port | Short Name |
|---|---|---|
| Administration | 8070 | |
| Authentication | 8071 | |
| Provision | 8072 | DPS |
| Management Console | 8073 | DMC |
| SSO Service | 8074 | SSO |
| SSO Management | 8075 | |
| Self-Service Console | 8076 | DSS |
For my exampole I am going to create a Virtual Service for Ports 8073 and 8074.Tha Management Console and Single Sign on Ports, respectively.
...
This will take you to the Layer 7 properties screen...

Please select the options as follows
Basic Properties set the Service type to HTTP-HTTPS/2-HTTPS (see picture above)
Standard Options set Mode in Persitance Options to Source IP (See picture below)

SSL Properties , enable SSL Accelration and check Reencrypt.
In the Certificates section Highlight the certificate you imported earlier and move it accross to the right hand box, then click Set Certificates.

Advanced Properties in the section Add HTTP Headers select X-Forwarded-For (No Via) From the drop down

We are going to add real servers.
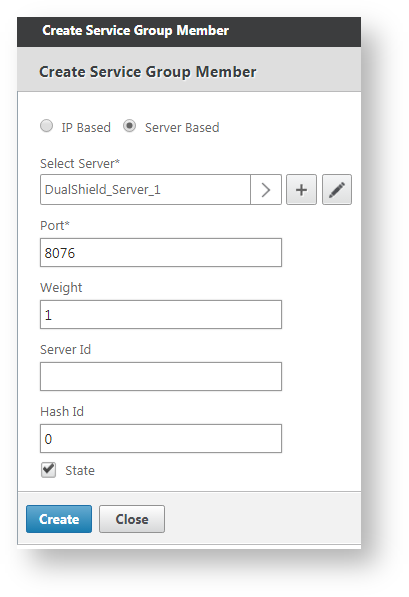
Select a real server, i.e. DualShield-Server_1, enter the port number that the service works on, i.e. 8076 for DSS (DualShield Self-Service Console)
Click "Create" to create the service group.
Repeat the same step above to add all real servers, i.e. DualShield_Server_2.
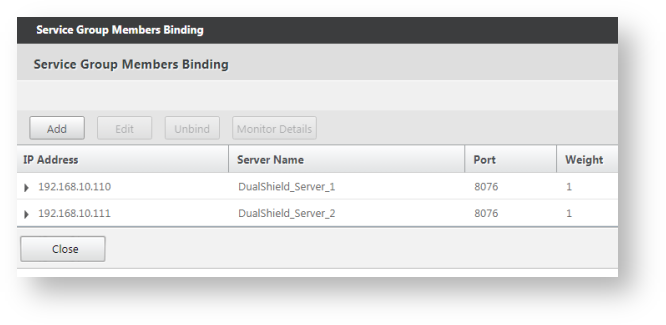
Now, we have create a service group called "DualShield_DSS" for the DualShield Self-Service Console. This group includes 2 real servers: "DualShield-Server_1" and "DualShield-Server_2"
Repeat the same steps above to create service groups for other DualShield services, such as: SSO, DMC, DPS, etc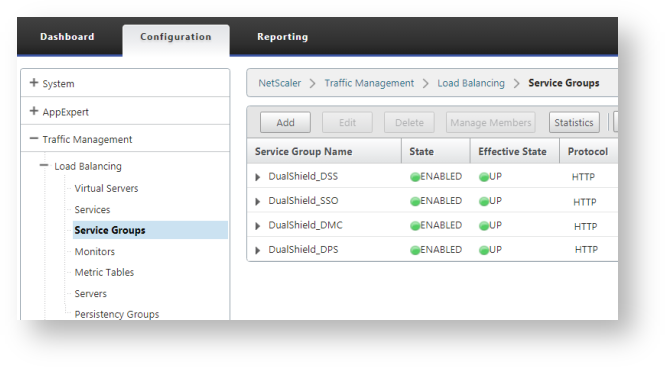
Create Virtual Servers
Now that we have created all service groups, we will create load balancing virtual servers.
Navigate to "Load Balancing > Virtual Serves", click "Add".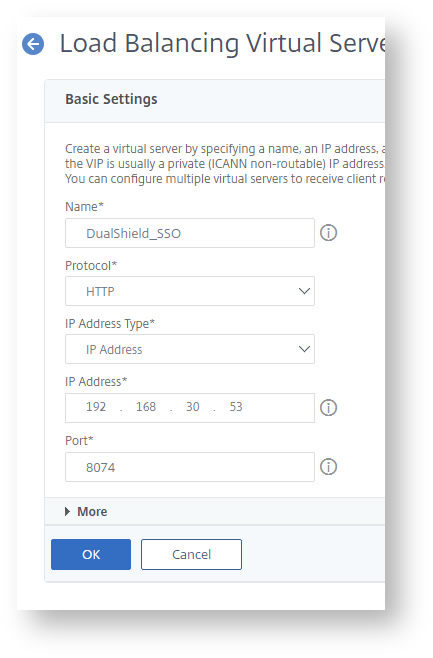
Enter "Name", "IP Address" and "Port" for the virtual server.
Click "OK" to save it.
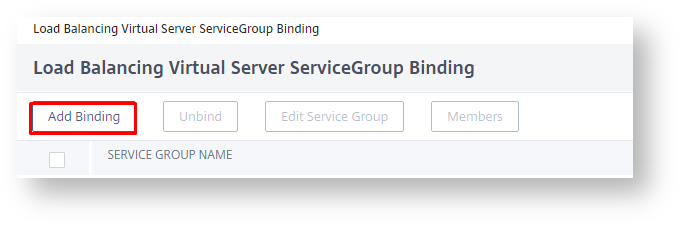
Now, we need to bind the newly created virtual server to a service group. In this example, we'll bind this virtual server to the DSS service group:
Click "Load Balancing Virtual Service Group Binding"

Click "Add Binding"
Select the "Service Group Name"
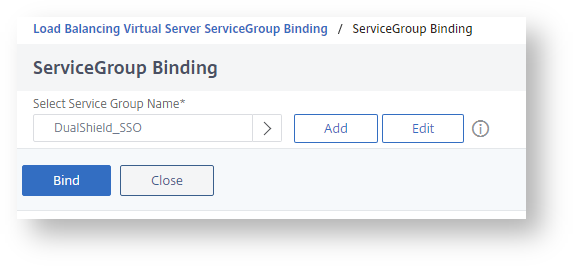
Click "Bind", and "Done".
Now, a virtual server has been successfully create for the DualShield SSO.
Repeat the same steps to create virtual servers for other DualShield services, e.g. DMC, DPS, DSS etc.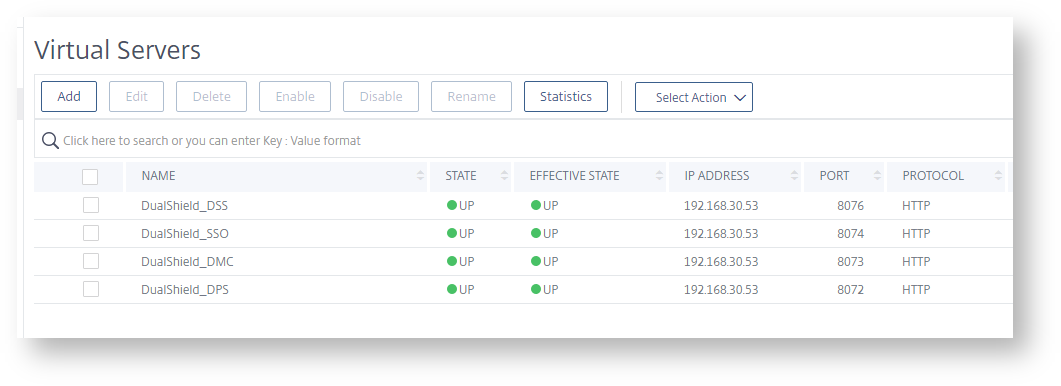
Anchor _GoBack _GoBack
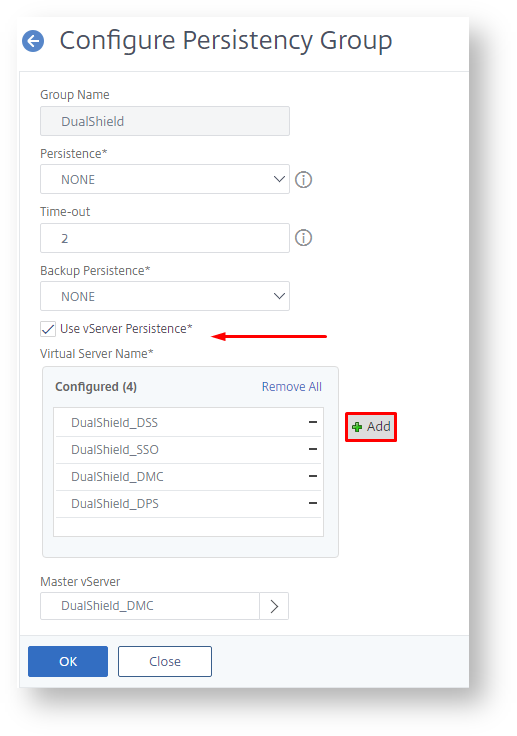
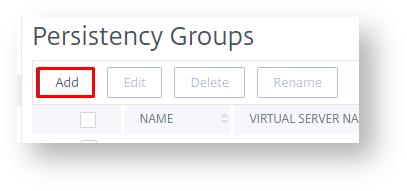
Create Persistency Group
The last item we need to create is a Persistency Group.
Navigate to "Load Balancing > Persistency Group", click "Add".
Enter "Name", enable "Use vServer Persistence" and add all the virtual servers we have created.