This tutorial shows how to configure a cluster with two DualShield servers. This cluster is load-balanced by Citrix Netscaler load balancerKemp LoadMaster.
Table of Contents
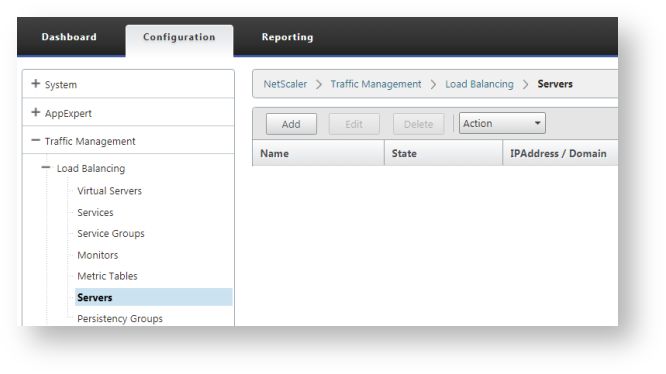
Create Real Servers
Import SSL Cert
If DualShield Servers are SSL enabled then you need to import the DualShield's SSL certificates to the LoadMaster
Log into
...
Kemp LoadMaster console and Navigate to "Certificate & Security> SSL Certificates" :

Click "Import Certificate" button on the top right.

Here you can import your private/public key, or upload a PFX file.

Once you Save the Certificate file, please select it from the drop down and then click on Use Certificate.
In the example below, a self-signed cert is being used:

Create Virtual Services with TLS Termination
Click "Add" button on the toolbar to add a DualShield server:
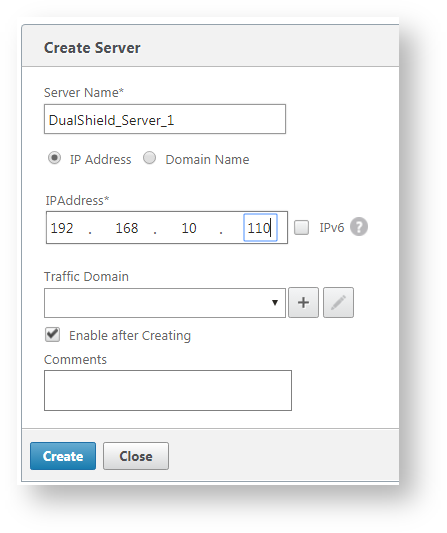
Repeat the step above to add all DualShueld servers:

...
A DualShield server hosts a number of services. Each services service works on a specific port. Below is a list of DualShield services and their port numbers:
| Service Name | Port | Short Name |
|---|---|---|
| Administration | 8070 | |
| Authentication | 8071 | |
| Provision | 8072 | DPS |
| Management Console | 8073 | DMC |
| SSO Service | 8074 | SSO |
| SSO Management | 8075 | |
| Self-Service Console | 8076 | DSS |
| , DSC |
In this example, we're going to create a Virtual Service on ports 8073 and 8074 for the Administration/Management Console and Single Sign-on services, respectively. We will create a service in the load balancer for each of the above DualShield service
Navigate to "Load Balancing > Service Groups", click "AddVirtual Services > View/Modify Services".
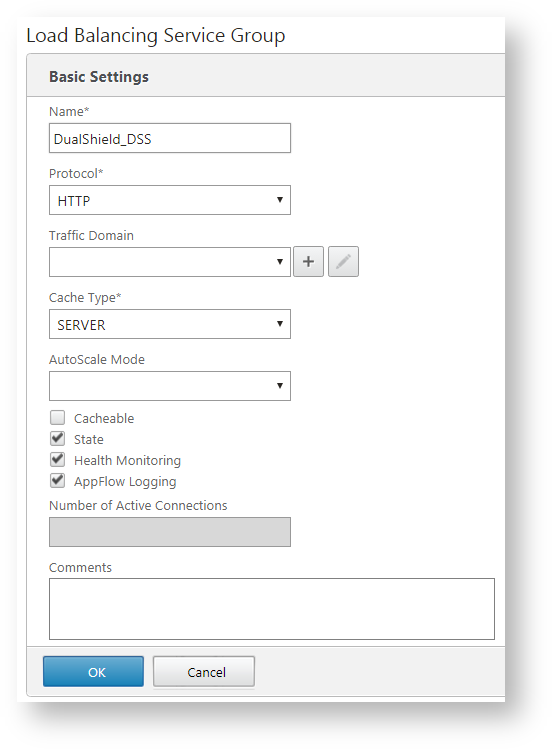
As an example, will will create a service for DSS. Enter the name and select "HTTP" as the protocol.
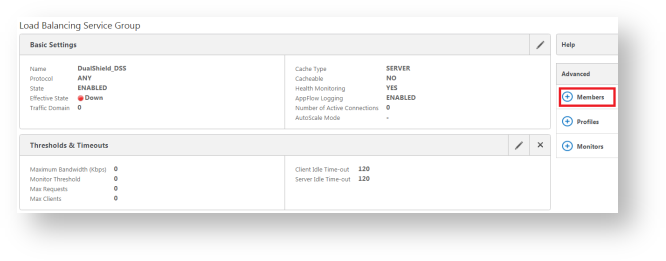
Click "OK", then select "Advanced > Members"
We are going to add real servers.
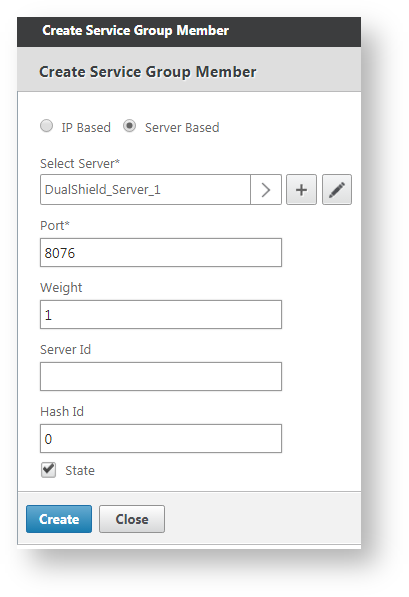
Select a real server, i.e. DualShield-Server_1, enter the port number that the service works on, i.e. 8076 for DSS (DualShield Self-Service Console)
Click "Create" to create the service group.
Repeat the same step above to add all real servers, i.e. DualShield_Server_2.
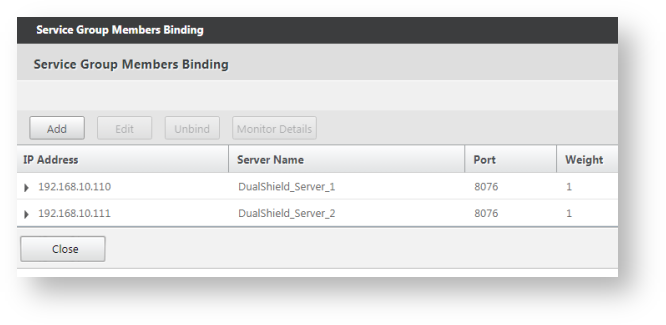
Now, we have create a service group called "DualShield_DSS" for the DualShield Self-Service Console. This group includes 2 real servers: "DualShield-Server_1" and "DualShield-Server_2"
Repeat the same steps above to create service groups for other DualShield services, such as: SSO, DMC, DPS, etc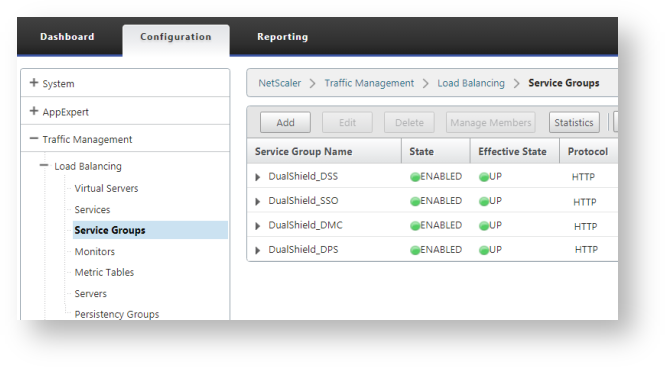
Create Virtual Servers
Now that we have created all service groups, we will create load balancing virtual servers.
Navigate to "Load Balancing > Virtual Serves", click "Add".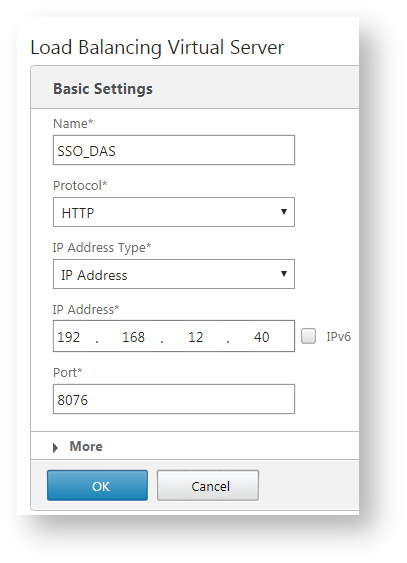
Again, we're using DSS as an example.
Enter "Name", "IP Address" and "Port" for the virtual server.
Click "OK" to save it.
Now, we need to bind the newly created virtual server to a service group. In this example, we'll bind this virtual server to the DSS service group: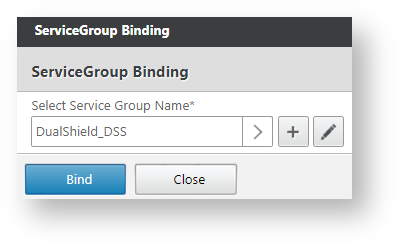
Click "Bind", and "Done".
Now, a virtual server has been successfully create for the DulShield Self-Serviice (DSS) console service.
...

Click "Add New" from either in the main menu or within View/Modify Services screen

Now specify the Virtual IP address you wish to use, The Port number (In this example we use port 8073) and the Protocal will be TCP

Click on Add This Virtual Service on the bottom right.
This will take you to the Layer 7 properties screen...

Please select the options as follows
Basic Properties set the Service type to HTTP-HTTPS/2-HTTPS (see picture above)
Standard Options set Mode in Persistence Options to Source IP (See picture below)

In the SSL Properties section, enable the SSL Acceleration and Reencrypt option.
In the Certificates section, highlight the certificate you imported earlier and move it across to the box on the right, then click Set Certificates.

In the Advanced Properties section, select X-Forwarded-For (No Via) From the Add HTTP Headers drop down list

In the Real Servers section, click on the Add New Button
![]()
Type the IPv4 Address of the Primary DualShield Server

The Port should have autocompleted with the port number you specified when creating the virtual service (see above) If it doesn't please add the port number you are referring to.
Click the Add This Real Server button on the right hand side.

Click OK on the confirmation message at that appears at the top. Repeat the process to add the IP address of the Secondary DualShield Server.
The configured Real Servers will appear on the bottom left hand side.
Once completed click on the Back button. The list of real IP's will appear as below.

Click Virtual Services->View/Modifies Services in the main menu again and Add New.
Repeat the steps above, again to add another Virtual Service tied to another Port.
In this example, we have only added Services for ports 8073 and 8074.

Modify DNS
Modify your DNS entry so that the IP for your DualShield Server's FQDN points to the virtual IP you set up in Kemp LoadMaster
...
Create Persistency Group
The last item we need to create is a Persistency Group.
Navigate to "Load Balancing > Persistency Group", click "Add".
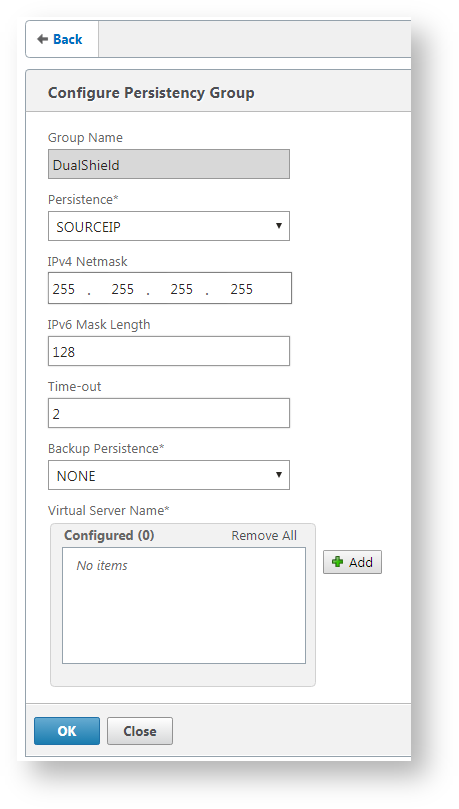
Enter "Name", and add all the virtual servers we have created. 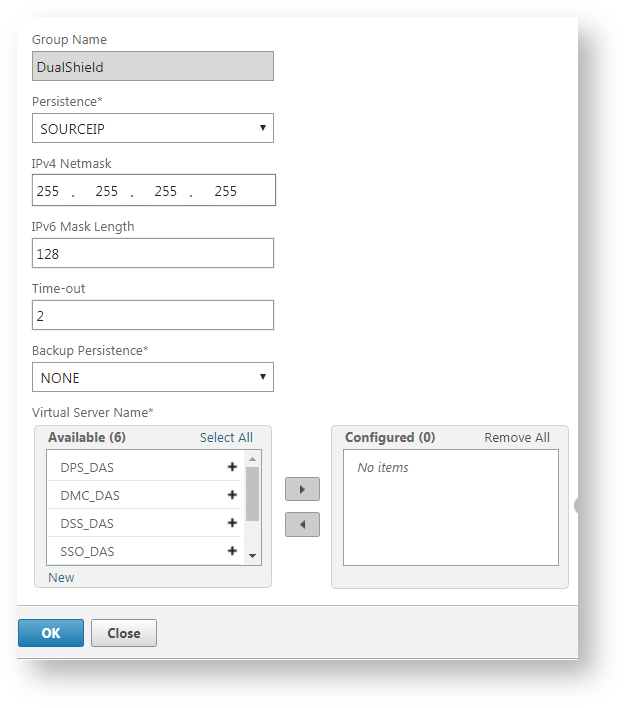
That's done.