| Table of Contents |
|---|
Create a RADIUS logon procedure
- Login to the DualShield Administration Console
- In the main menu, select "Authentication | Logon Procedure"
- Click the "Create" button on the toolbar
- Enter a name and select "RADIUS" as the type

- Click "Save"
- Click the context menu icon of the newly create logon procedure, and select "Logon steps"
- In the popup window, click the "Add" button at the top.
- Select the desired authenticator, e.g. "static password + one-time password"

"One-Time Password" as the first step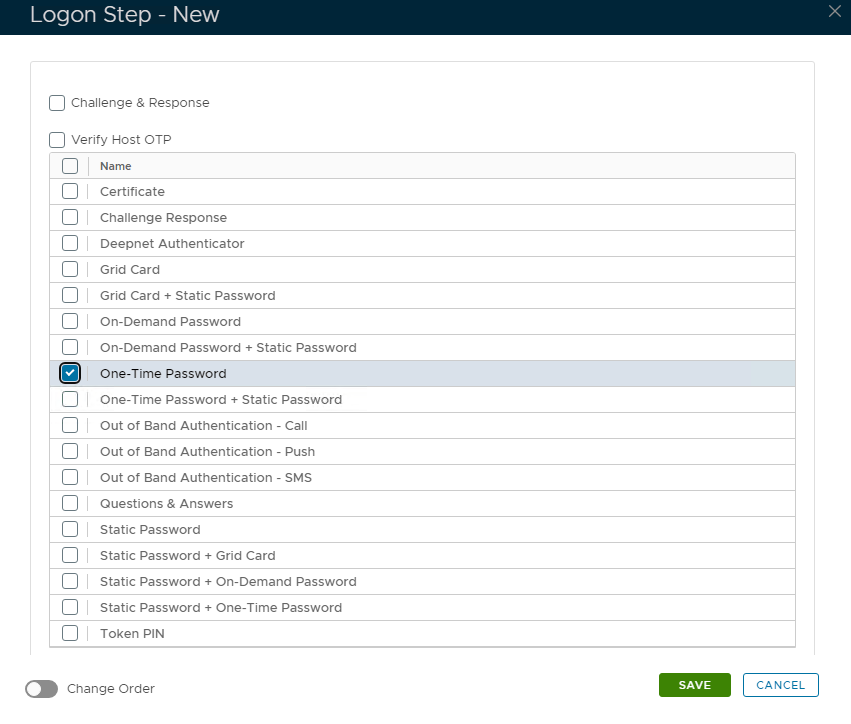
- Click "Save"
- Click "Add" again to add a second Logon Procedure
- Select OOBA Push as the second step

12. Click "Save"
Create a RADIUS application
- In the main menu, select "Authentication | Applications"
- Click the "Create" button on the toolbar
- Enter a name and select a realm
- Select the newly created logon procedure

- Click "Save"
- Click the Context menu of the newly created application, select "Agent" and then select the Radius agent.

- Click "Save"
- Click on the corresponding Elipses and choose "Self Test" from the menu.


Register Network Policy Server as a Radius Client
- In the main menu, select "RADIUS | Client"
- Click the "RegisterCreate" button on the toolbar
 top right.
- Enter a friendly name
- Click on the magnifying glass and select the Radius Server
- Select the application that was created in the previous steps
- Enter Network Policy Server’s IP in the IP address field
- Application from the drop down list.
- Click on the Cogwheel to the right to enter the IP address of the Network Policy Server and click "Add" then "Save"
- Enter the Shared Enter the Share Secret which will be used in Network Policy Server
- Select "PAP" "Chap" & "MSCHAP2" as the Authentication Protocols
- Click "Save"